Esterházy Cake and Mr. Wilson #CakeSliceBakers

When I was a kid, I remember watching a live action version of Dennis the Menace. The main plot revolves around Mr. Wilson’s plant that he’s taken care of for many years, preparing for the one time it blooms—briefly, but spectacularly. Dennis, being the trouble-maker that he is, breaks tons of stuff and causes problems that (predictably) result in Mr. Wilson missing his flower’s once-in-a-lifetime bloom. It’s funny—as a kid I sympathized with Dennis against all the mean adults who should have been more patient and understanding. Now I totally identify with Mr. Wilson! In fact, I can’t even watch movies where kids make huge messes and destroy things any more. Too close to real life, maybe.
(Shudder)
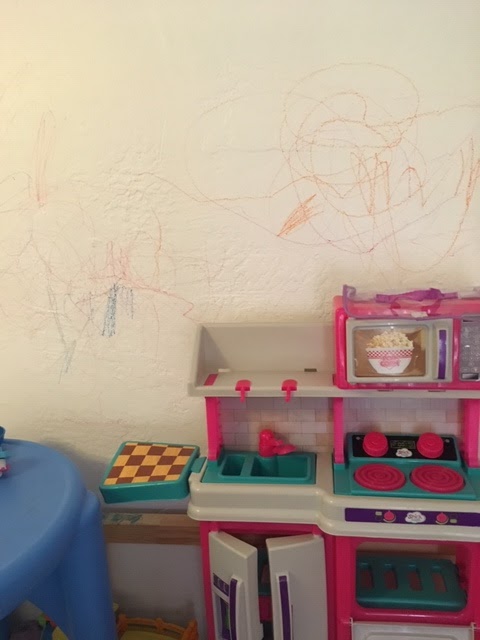 |
| Good thing Magic Erasers are full of so much magic |
I’m turning into an old person.
Get off my lawn, you hooligans!
In a way, Mr. Wilson’s plant reminds me of this month’s Cake Slice bake—the Esterházy Cake. It is truly a celebration cake, a bit of a production to get on the table, and doesn’t last long ;) It was certainly eaten eagerly, but also is not the kind of cake you can assemble a day or two before or keep out at room temperature for long.

I made this cake to serve at a party for my sweet sister-in-law and new niece. It was definitely a cake fit for royalty—a new little princess, or historically: a prince. More specifically Hungarian Prince Paul Anton Esterházy Von Galántha.
Here he is, handsome devil:

 Apparently, he was the kind of guy you want to invent a cake for and name it after. And, it is one of the most famous cakes in Central and Eastern Europe. Who knew! (People familiar with the Austro-Hungarian region, I guess)
The cake contains several elements—tender layers of dacquoise, an apricot mascarpone cream, and my new best frosting friend: a chocolate French buttercream.
The dacquoise was unlike others I’d had in the past. I thought it would crisp into a crunchy meringue, but it was much softer and cake-like than expected—so much so that I remade the recipe, convinced that I’d done something wrong. It came out the same way the second go-around. This is not to say that I couldn’t have done something wrong twice—I’ve never claimed dacquoise infallibility. Possibly wrong or not, it was tasty.
The apricot cream was the cake’s secret weapon. The chocolate buttercream was super rich and decadent, but the fruited mascarpone layer made it the kind of dessert you’d want to eat more than a few bites of.

To add a pop of color and bite of tartness, I decorated the top with raspberries. That added another very complimentary note to the flavor profile.
I found that the cake was just too soft to frost without spending some time in the freezer. However, that made the chocolate feathering on the glaze set too quickly and look more like broken sticks. I would recommend using a ganache instead of straight melted chocolate to avoid this problem. Unless you’re going for the broken stick look.

As mentioned before, this cake requires some planning. The individual elements take a while to make, and once the cake is assembled, the clock is ticking. The chocolate buttercream and apricot mascarpone are very soft, and left too long in a warm room would likely cause your cake to melt into a puddle. You’d have to put it in a bowl and call it Esterházy trifle. And I suspect that the tender dacquoise would get also get soggy. Not that I was able to test either of these doomsday predictions—it was gobbled up before anything disastrous had a chance to occur.
If you’re looking for something really special and have some time to prepare, try out this delicate flower of a cake.
Just don’t invite Dennis the Menace ;)

Esterházy Cake

Dacquoise:
1 c sugar
8 egg whites
1 teaspoon vanilla
1 3/4 c whole almonds or almond meal
A shake of cinnamon
1. Heat the oven to 375 degrees. Take four sheets of parchment paper and draw an eight-inch circle on each.
2. Using a stand mixer, whisk together the sugar, egg whites and vanilla until you get stiff peaks (about 6 minutes). Pulse the almonds, cinnamon and flour in food processor until you get fine crumbs, but not until it’s almond butter like I did the first time. Carefully fold in this mix into the meringue.
3. Put one cup of almond meringue on each circle you traced, spreading it thinly into an even layer. Put the parchment on a baking tray and bake each one individually until edges are golden—10-12 minutes. After cooling for a bit, remove the paper and allow to completely cool on a wire rack.
Chocolate Buttercream
5 egg yolks
1/3 c water
1 c sugar
1 T corn syrup
1 1/2 cups room temperature butter
1/2 cup melted chocolate (I used bittersweet, and it was perfect)
1. Beat the yolks with the whisk attachment in a stand mixer until thickened and light yellow. In a small saucepan, heat the sugar, corn syrup, and water on medium heat (don’t stir!) until it reads 238F on a candy thermometer.
2. With the mixer running on low, slowly pour the molten sugar syrup into the yolks. And be careful—ain’t no pain like a hot sugar burn. Yowza! Beat until glossy, thick, and the outside of the bowl is cool (at least 5 minutes). Add the butter a cube at a time, beating well before each addition. Lastly, pour I. The melted chocolate and whisk a minute until combined.
Apricot Cream
4-oz softened mascarpone
2 T brandy
1/4 c apricot jam
1 t vanilla
1/4 c sugar
1 c cold heavy cream
1. Beat the mascarpone, jam, vanilla and brandy one minute or until smooth. In a different bowl, whisk the cream and sugar until you get stiff peaks, then add the apricot mixture and bring to stiff peaks again (about 1 minute).
Glaze
2 T heavy cream
1/4 cup melted dark chocolate*
2 T white chocolate chips
Sliced almonds to put around the sides
1. Heat the cream until it is super hot. Pour over the whit chocolate chips. Allow to sit for a couple minutes, then stir until smooth. Melt the dark chocolate (*add 2 T additional hot cream if you don’t want your chocolate to set too quickly on the cold cake. Or let the cake warm up--but remember: tick tock!)
Assembly!
Layer the dacquoise, alternating with buttercream and apricot cream. Freeze until solid, then frost with remaining chocolate buttercream.

About the Cake Slice Bakers:
We're a group of bakers that bake through a cake-centric cookbook each year. Every month, we choose from a selection of four of the book's recipes. Follow the Cake Slice Bakers on Facebook, Instagram, and Pinterest for baking inspiration and pictures of past bakes. You can also check out the CSB blog where links are updated monthly. If you're a blogger and want to join us in baking, send an email to thecakeslicebakers@gmail.com. If you are a baker but not a blogger and want in on this baking action, there is a new Facebook Group: The Cake Slice Bakers and Friends. Check out the thumbnails below to go to see what other members made!


I'm so glad someone made this Esterhazy Torte! Your cake is beautiful and I love the story about Mr. Wilson.
ReplyDeleteThanks, Danielle!
DeleteGreat job! I kind of like the "sticks" on the top! :)
ReplyDeleteThanks, Susan! We’ll call it “rustic chic” ;)
DeleteOh man, that cake is crazy gorgeous! P.S. I'm a combination of Mr. Wilson and Mrs. Kravitz!
ReplyDeleteLol, I love it! “Hey, Abner!” Thanks, Karen!
DeleteAfter seeing this beauty of a cake I wish I'd looked at this recipe a little closer. It looks delicious and I hope you're still patting yourself on the back for a job well done.
ReplyDeleteThanks, Sandra Lee! It was a fun one to make :) I’m loving baking through this book!
DeleteI absolutely love reading your blog posts. They are so funny and I feel like it is the two of us having a conversation. It sounds like this cake is a labor of love, and you certainly did it justice. I would also have to agree that I fall in the Mr. Wilson side now and a mess makes me twitch.
ReplyDeleteHaha, Thanks Felice! I’m glad I’m not the only Mr. Wilson in the making! I am having so much fun baking along with this group, getting to write about the experience, and reading how it went for everyone else :) Love your blog too! Such gorgeous photos!
Delete